Wix Events Step-by-Step Setup Guide: Event and Feedback Setup
Level up your business using Wix Events! This series shows you everything you need to know about creating an amazing event experience!
Level up your business using Wix Events! This series shows you everything you need to know about creating an amazing event experience!
Your business is ready to launch. You’ve got an awesome event which you just can’t wait to share with the world. Now it’s time to figure out exactly how to do it.
You’ve come to the right place!
In this article, I’ll step you through exactly how to set up an event using the excellent Wix Events App from website hoster Wix.
There’s a ton of great options out there for selling events. I certainly haven’t reviewed them all, but I can provide some great reasons to choose this one:
There’s a ton more, but hopefully that gives you some reasons to go!
This in-depth tutorial series teaches you everything you need to know to setup and publish events using the Wix Events app. You’ll learn how to:
Each episode has a full list of the episodes at the bottom and solves a particular part of the puzzle.
If you need extra help, don’t hesitate to reach out to my company Creative Appnologies. We would love to help you ❤️
As with everything I write, I hope you find this helpful ❤️. It would mean the world to me if you took the time to give me a ‘clap’ on Medium, or subscribe to my email list. If you’re looking to subscribe to Medium, feel free to use my referral link (it doesn’t cost you any extra, but does mean I get a portion of your subscription fee).
Enjoy, and feel free to drop me a DM on twitter, connect on LinkedIn / Github with thoughts and comments 😃
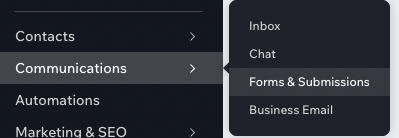
Our first step is to create the Event. For this we need the Wix Events App. The steps to do this are below.
2. On your dashboard, navigate to the ‘Apps’ component
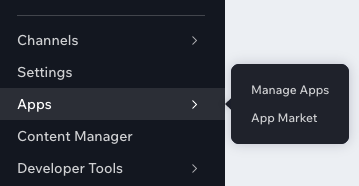
3. Select the ‘App Market’ option
4. Search for Wix Events in the search bar. For me, the first option to come up is the Wix Events App (as below)
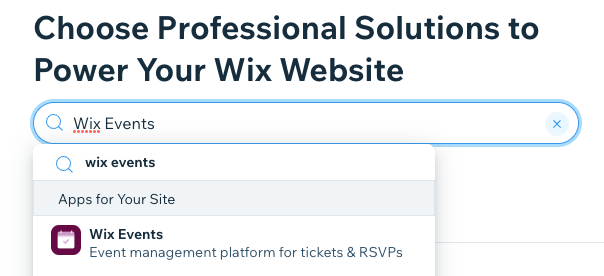
5. Select Wix Events
6. This will take you to an overview of the app.
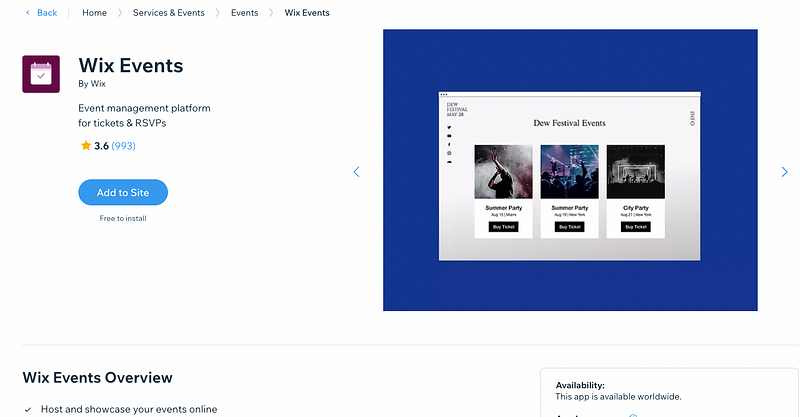
7. Choose ‘Add to Site’. You should get a loading screen then something like this pop up
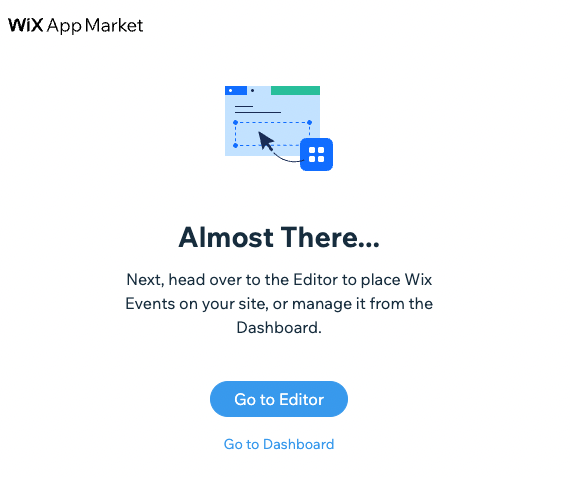
In the pop up screen which follows, you have a choice.
You can choose either, but for this tutorial, we will first set up an event for ourselves, before publishing it to our production site.
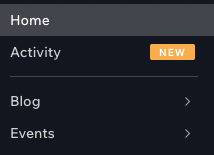
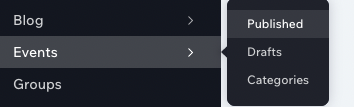
To get started with creating your event, you need to navigate back to the dashboard. Make sure that your dashboard has been reloaded, otherwise you won’t get the ‘Events’ option (below).
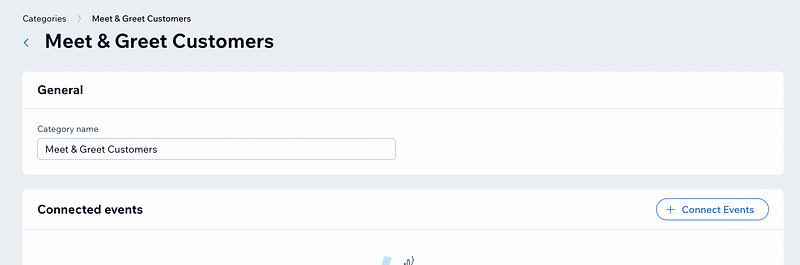
Before we create the event, we want to create some categories. Categories are a useful way to group multiple event types together. You can use them in Episode 5 to filter the display of events to specific pages.
To do this:
2. Choose ‘New Category’

3. Fill out the name of the Category. I’ve called mine ‘Meet & Greet Customers’. For now, leave the ‘Connected Events’ section.
Now it’s time to create our Event. This is section deals with setting up the ‘wireframe’ of our event. We’ll go into more configuration details in a future episode.
To do this, follow these steps:
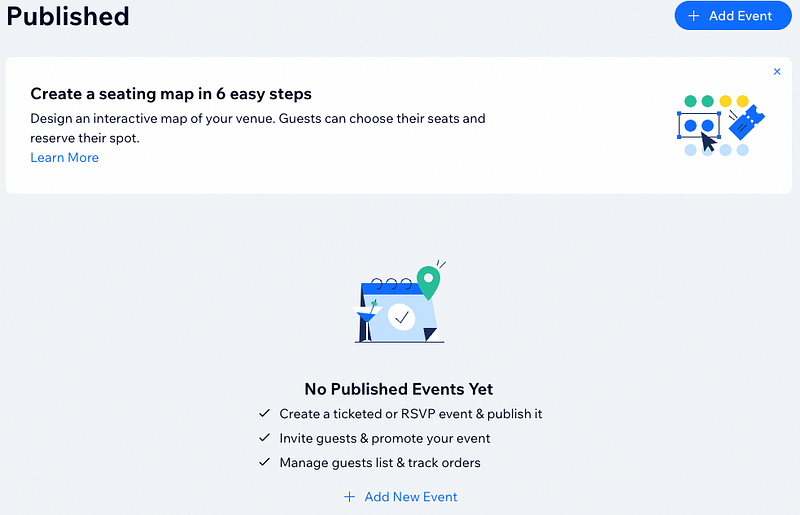
2. Choose “+ Add Event’. You can see from my screenshot below that we don’t have any published events yet. This may different for you if you’ve created an event before.
3. Choose your event type. There’s a list of options to choose from, which I’ll outline in the next section
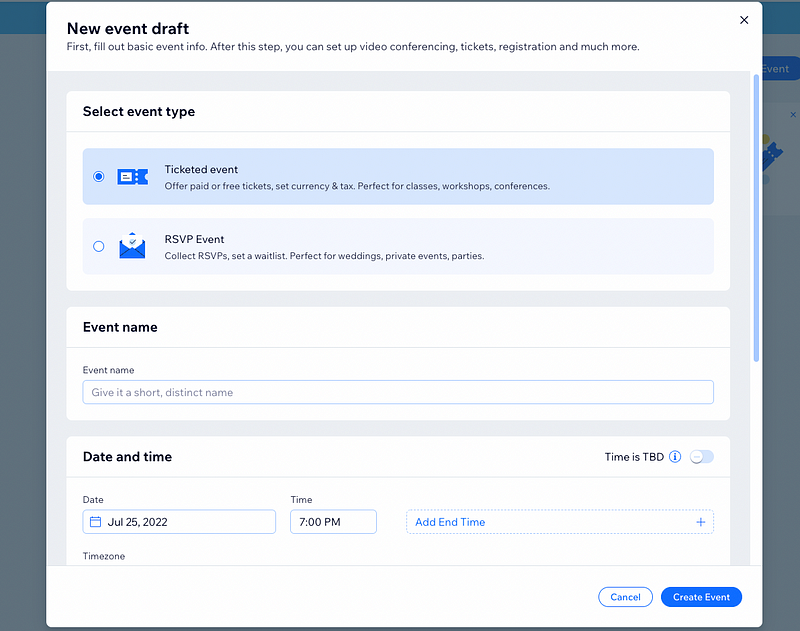
4. Once you’ve added in your options, select ‘Create Event’.
Nice work!
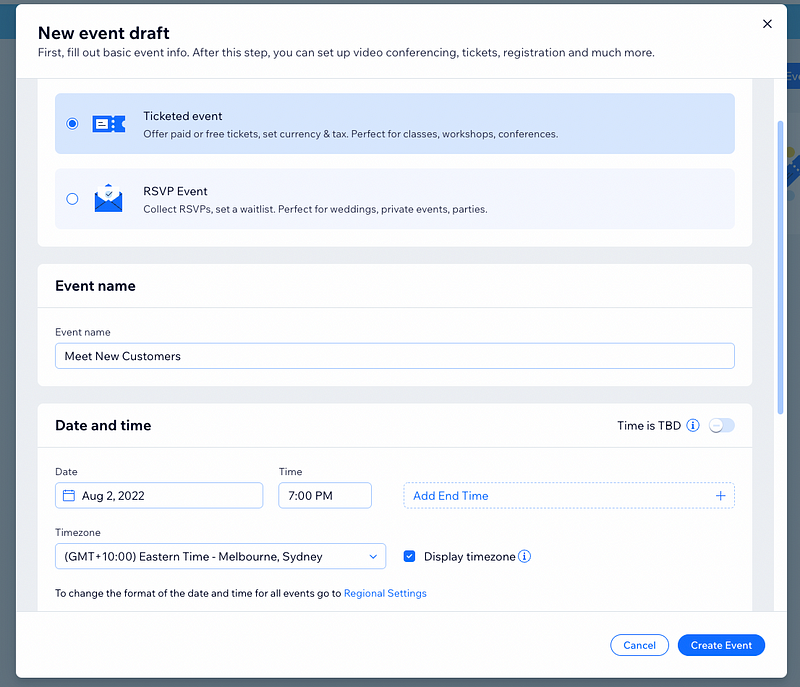
Once you’ve chosen your options, choose ‘Create Event’.
For mine, I chose the following options:
4. Create the Event.
Very cool and well done! You’ve solved the first step!
Effective business is built on a foundation of serving customers effectively. Today’s data systems allow us to do this more effectively than ever!
A great way to serve our customers is understanding what’s needed at any given time. This saves our customers time, ensures our answers are relevant and streamlines our interactions. In return, we achieve greater sales and more ‘sticky’ customers.
If you’re looking for insight developing your sales strategy, I’ve written about that here.
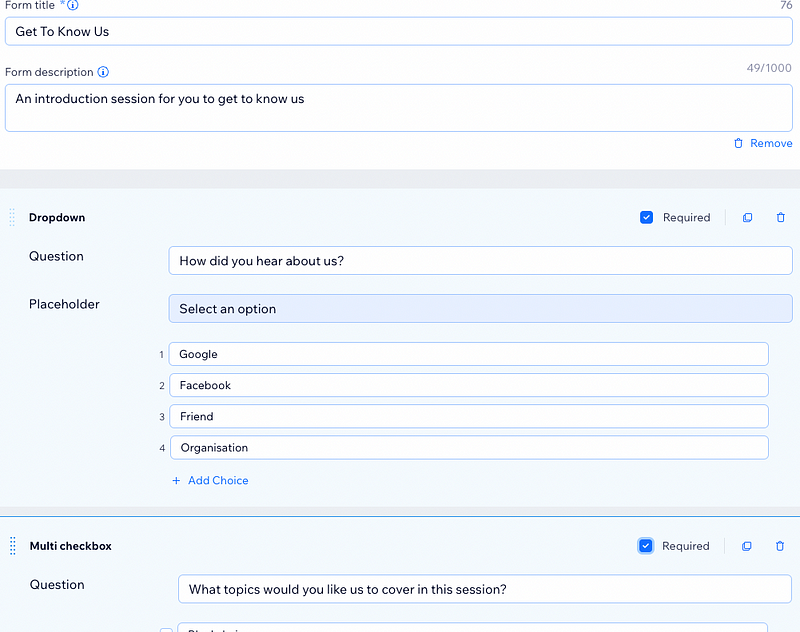
For this series, we’re going to develop a simple ‘Prior Knowledge Survey’. Our hope is that it will give us insight into what our customers are looking for from their ‘Meet New Customers’ event.
We’ll ask three simple questions (although I’m confident you can think of heaps more!):
To create the form, do the following:
2. Navigate to ‘Your standalone forms’ and select ‘+ Create Standalone Form’

3. Choose the form template you’d like to use and then ‘Get Started’
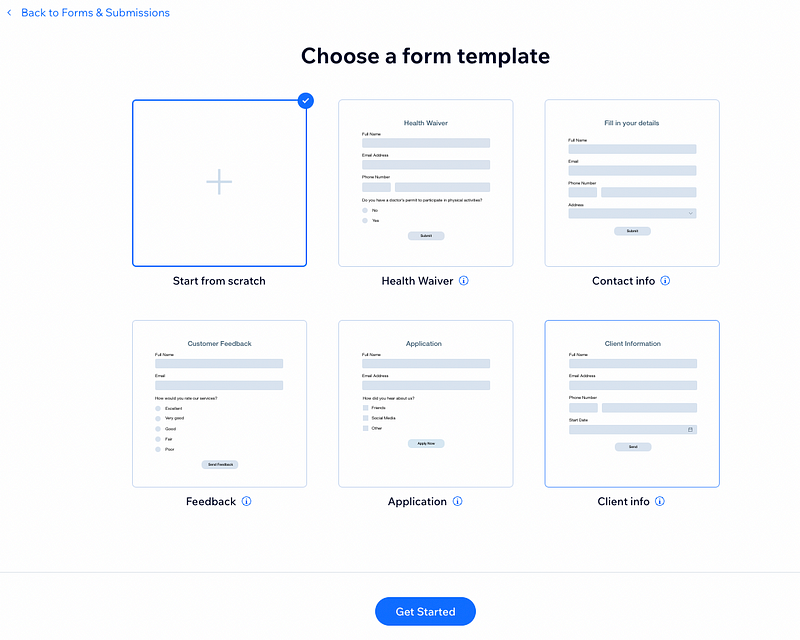
I chose ‘Start from scratch’ and this is what showed up.
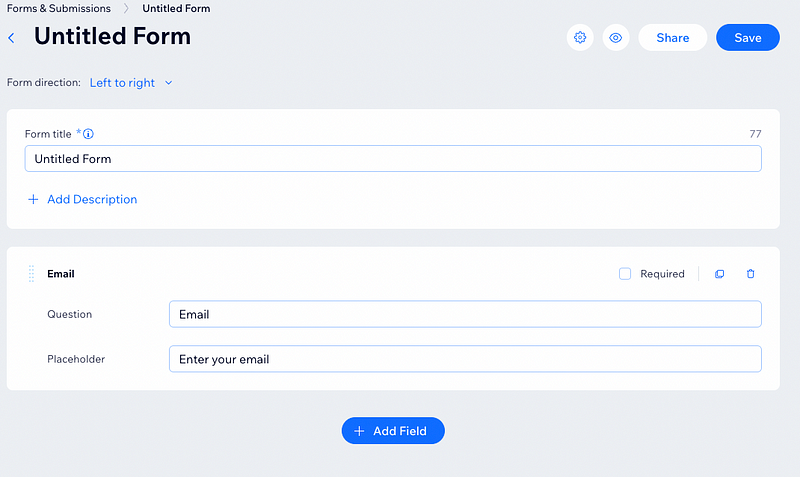
Now fill out the form options. Hopefully the fields are pretty self explanatory, but I’ll list them here just in case:
Go ahead and fill out your form now. Here’s what mine looked like:
Quick Note. For this use case, the form is anonymous. Therefore, I’ve removed any field requesting names, emails or any other identifying information. This might not work for you, so feel free to include them.
Once the form has the questions you’re looking for, go through the settings. You can include things like:
Once you’re done, save the form and move on.
Congratulations on completing the wireframe of your Wix Event! If this was your first one — thank you so much for sharing your journey with me! I’d love it if you dropped that into the comments ❤️
With our wireframe completed, we’re now ready to move onto the next step: Full Event Configuration!
I’ll see you there.